
Make it stand out
Introduce your brand
I wanted to review this kit as it’s kinda a specialty item, and there isn’t a lot of coverage of them online. So what is Ikarus Pattern? They’re a creator making conversion kits for Space Marine tanks. Generally these are focused on first founding chapters/legions, and they’re made for a variety of chassis. Best place to see their range is on Instagram. Unlike many digital sculptors they don’t sell the STLs and only sell 3d printed kits through select partners.
I’ll talk more about value at the end of this review but I think it’s worth stating up front that these are not cheap. I purchased the Crimson Seraphins OLD ASSAULT Tank Ikarus Pattern Conversion Kit, and it was $116 at time of purchase. This makes it $2 less than the cost of a new Land Raider Spartan from Games Workshop, which you need to build the model. So I’ll cover value at the end but right off the bat most people are not going to be interested in doubling the cost of a GW model kit. If you are, read on.
I ordered the the kit on May 21st and it was delivered June 30th. This was communicated on the Etsy page and was about the timeline that was promised. Obviously I’d rather have my toys show up sooner but they must be pretty backlogged. As with the cost this is something to be aware of, check the listing before you buy it.
The box came quickly once shipped and the packaging was very good. Each part of the cast was bubble wrapped and there was no damage to any from shipping. The kit is partly manufactured on sprues which isn’t really necessary for 3d prints but is a nice touch and helps this feel premium. However taking one sprue out of the bubble wrap caused a door to fall off the sprue showing some of the issues using sprue for 3d prints.
Ordering, Unboxing, Print Quality
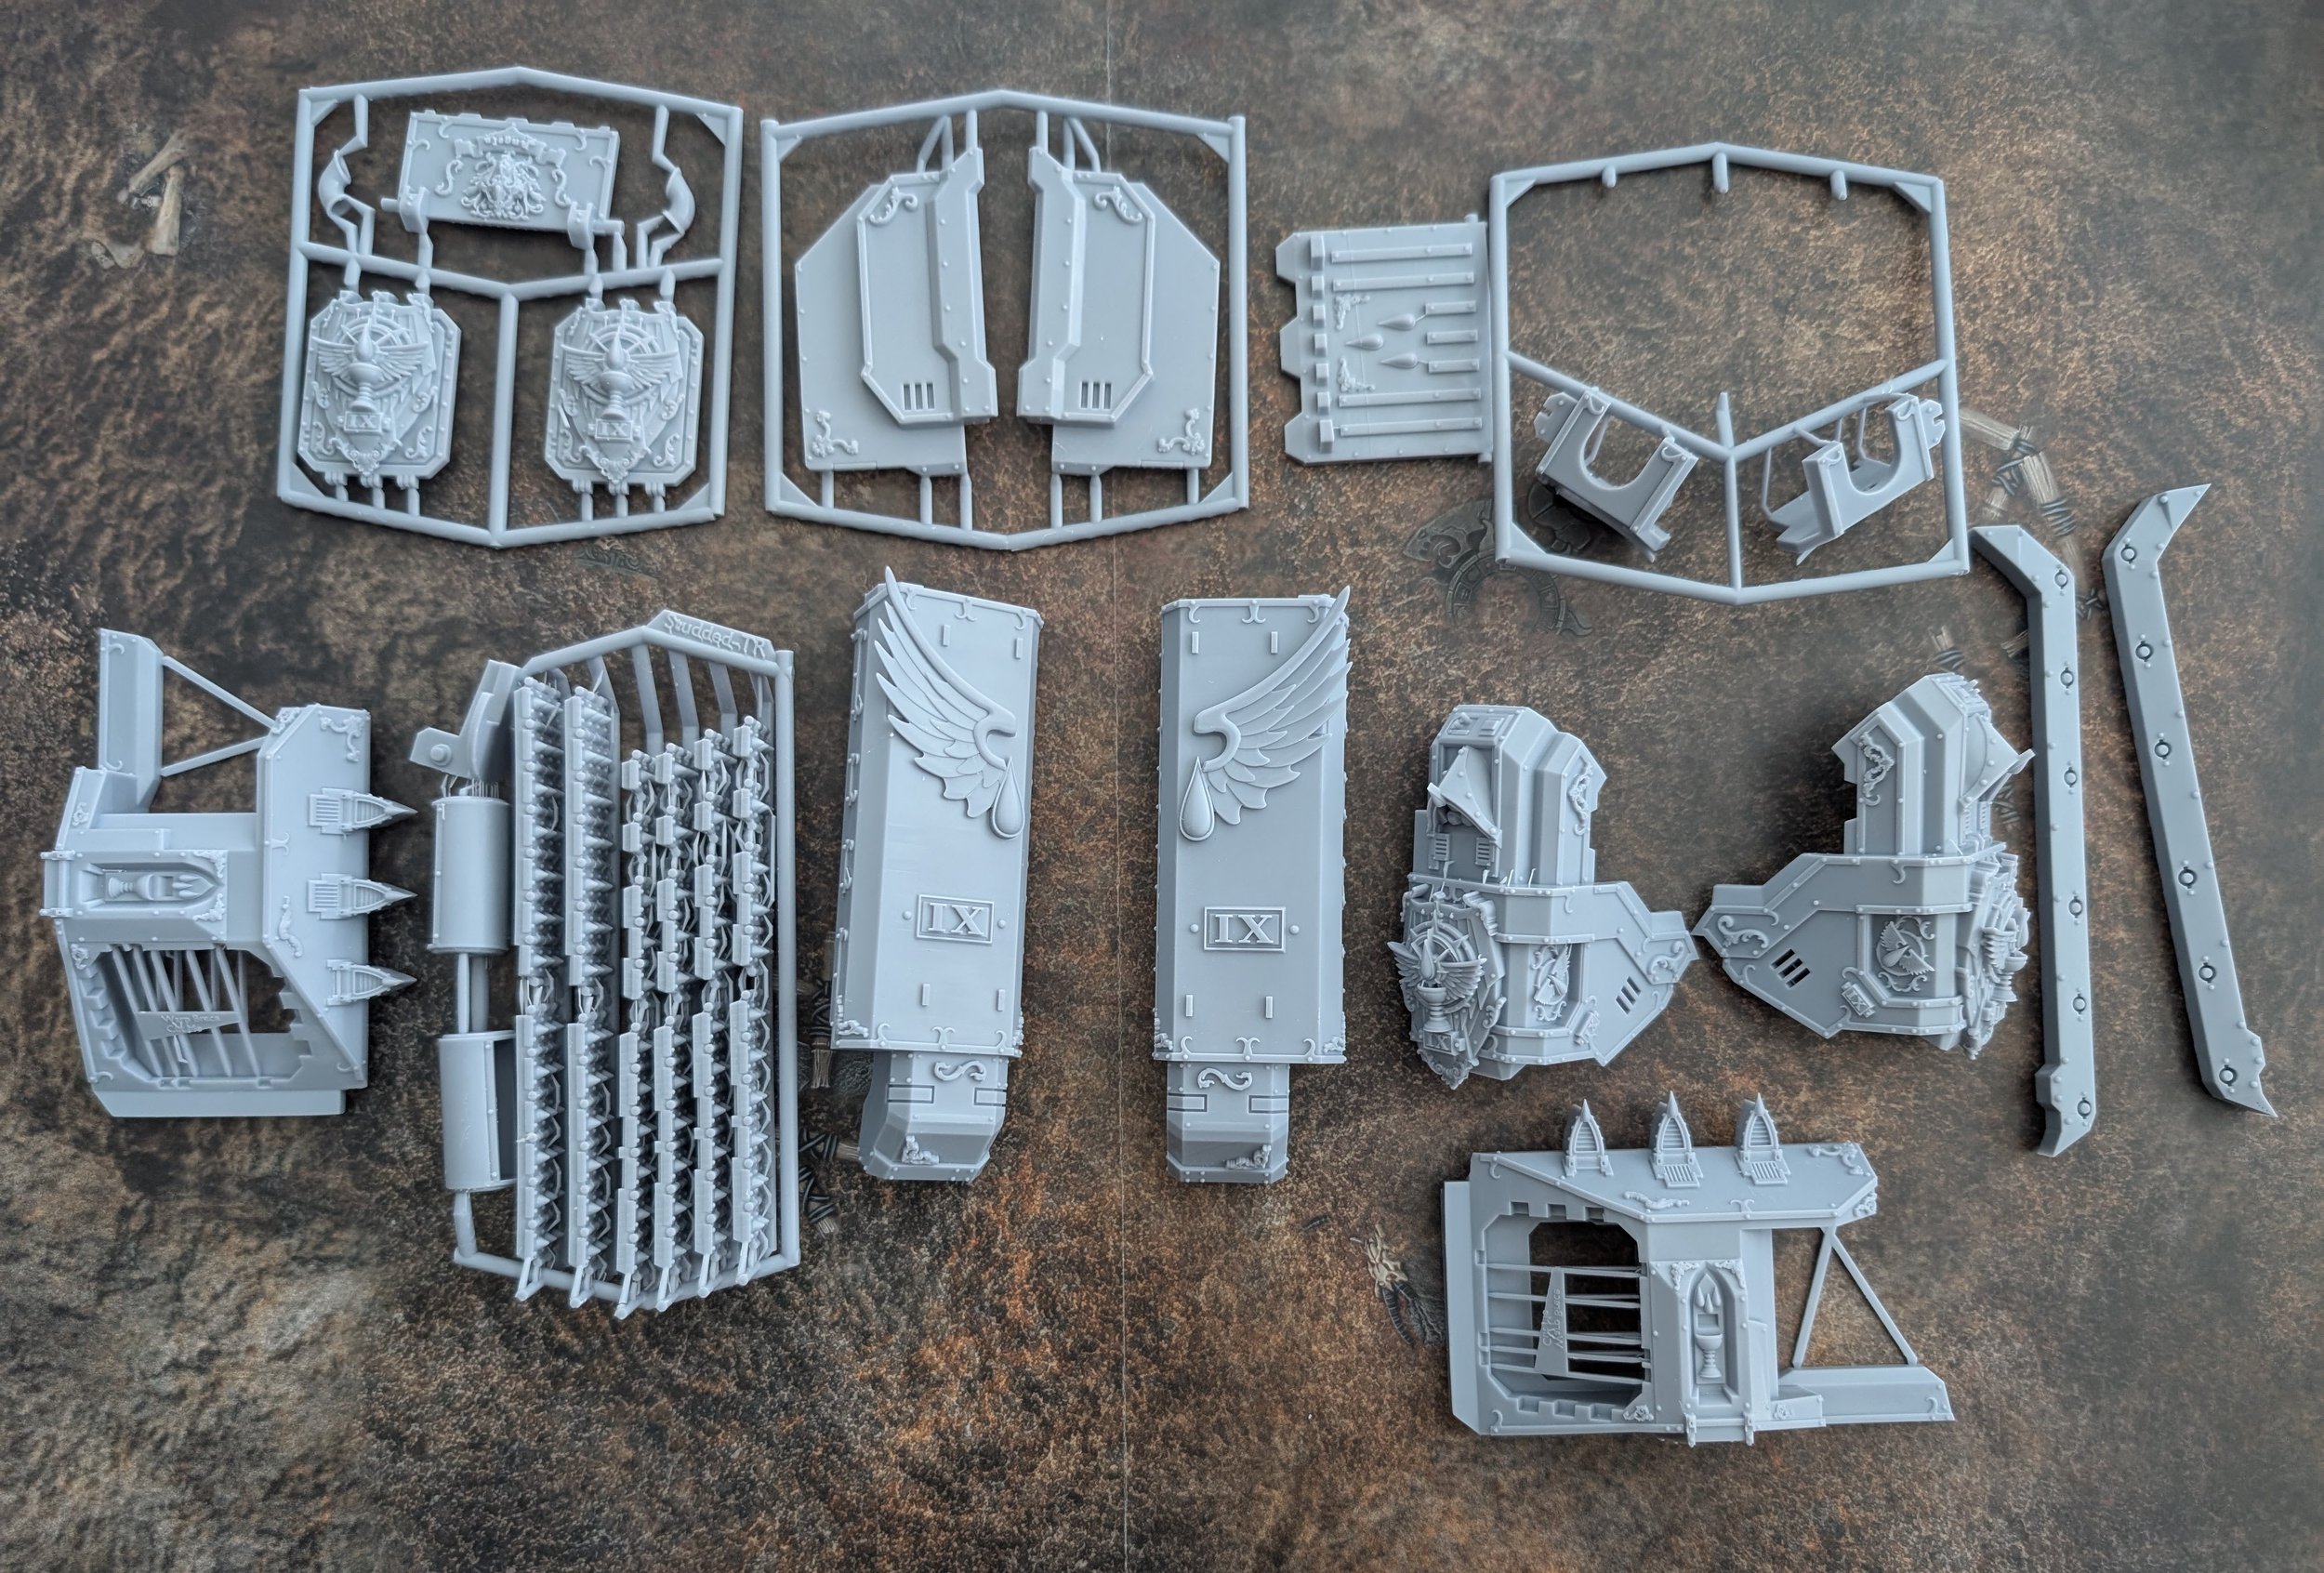


Print Quality
Most of the supports are removed but some cleanup is needed. In the photo ese the small connection points connecting the tips of the pattern. Note that these supports really need to be cut off the print. Not a problem but more involved than some support removal.
The print quality itself was mostly good. There are some artifacts on some of the large flat surfaces but (spray) primer hid them. However there were two larger imperfections shown below.
On the left we have the smaller issue, seems like there was an issue with supports on this part of the model. This would be a problem however how the model is constructed mostly hides this.
The more annoying and larger problem is below on the right, there was a pretty notable layer shift. I was able to clean this up but it took some time and my over-zealous use of my fiberglass scratch brush lost a little of the detail below the layer shift.
For the size of the print I’m happy with the quality, for the cost of the print I’m less pleased. I should make clear that I’ve not asked for replacement parts as I don’t need them, so don’t take any of this as a slight to the customer service, just be aware that some cleanup may be needed for your print.

While there were a few issues with the print the resin quality is fantastic. There was no damage to the parts in shipping and I can’t imagine what would be able to cause any. Detail is crisp and you can see in the bend test below it’s very durable. I didn’t get this bit of sprue to snap.


Building the Kit
Unfortunately the experience takes a bit of a nose dive here. Building the kit reminded me a lot of a Forge World resin/plastic kit and anyone who has worked with one of those can confirm the experience sucks.
As a 3d print it’s got some big advantages over resin, mainly that it holds its shape and you don’t have to worry about shaping it to the model. The big downside is it’s much harder to work with. You can’t use heat to bend it and I’d recommend against trying to shave it down.
The next issue is the instructions, there aren’t any. And I think that’s mostly fine, this is clearly an expert kit. But it does mean there is a lot of dry fitting and trial and error when building your model, not great when we’re talking about a $250 tank.
One question I had and still have is what would the build be like if you shaved off the raised areas on the Spartan. The kit is in large part clued to the large rivit-like shapes in the image (I believe these are axels for the tread wheels).
I feel like the kit might fit better if you cut/file these off, but I’m not sure if that would throw off the tolerances. This is where a build guide would really help.

I ended up with a few notable gaps and I’m not sure if this is due to a flaw in the design or print, or due to a mistake in assembly. That combined with the build not being very enjoyable certainly influences my desire to purchase more of these kits. I don’t think it kills my desire for more of them, but it tempers it.
If you’re getting one of these kits be prepared that you’ll have to build it, and that might not be fun. Dry fit twice, glue once.